4 Amazing Ocean Crafts for Preschool · Craftwhack
At that place are all sorts of amazing ocean crafts for preschool children, and whether you want to create jellyfish, pufferfish, whole bounding main floors, or whatever other sea-themed art project, at that place are plenty of options that are perfect to get little children engaged with the underwater world.
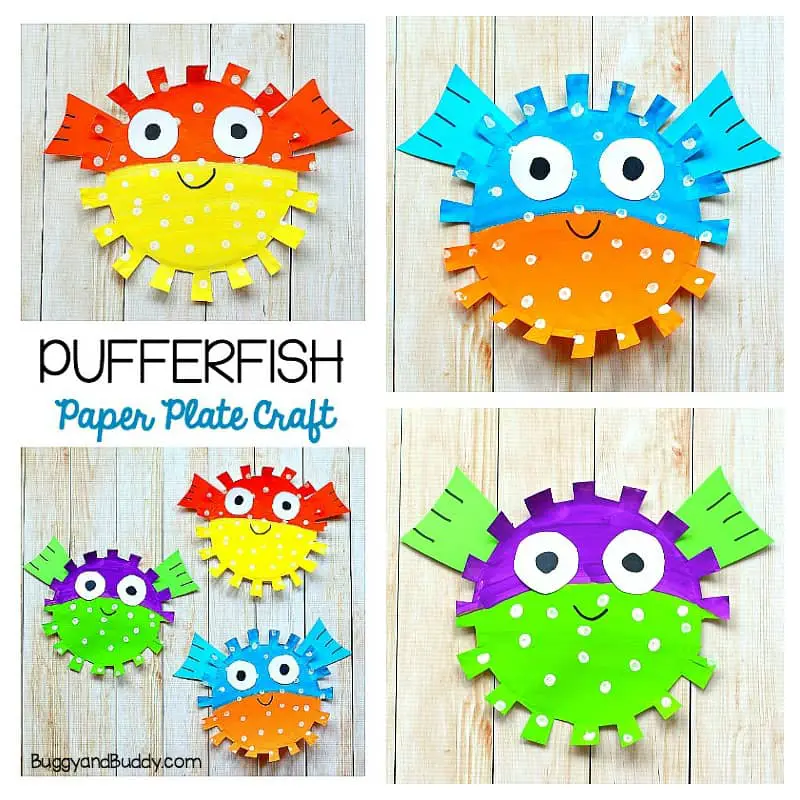
Paper Plate Puffer Fish
 Source: https://buggyandbuddy.com/newspaper-plate-pufferfish/
Paper plates are ideal for a whole range of crafts, and they are absolutely perfect for a paper plate pufferfish. Y'all can create many different designs and styles here using the basic design, so no matter what colors your child wants to use, they have options.
Materials
A paper plate pufferfish requires:
- 1 newspaper plate
- 2-3 different pigment colors
- Paintbrush
- Black marker pen
- White paper
- White mucilage
- Scissors
- Pencil
- 1Card in a color to suit your paint colors
Step i: Cut Around The Paper Plate
It may exist easiest to do this yourself, or assistance your child and make sure they don't cut themselves with the pair of scissors.
You lot are going to go all effectually the edge of the newspaper plate, cutting pocket-sized rectangles out to create an issue like the peak of a castle wall. These don't need to be particularly neat: merely make an overall foursquare-in-square-out effect around the whole plate.
Footstep 2: Pigment The Plate
Adjacent, you can pour out some paint for your child to pigment with. They may want to paint the two halves of the plate in unlike colors or experiment with stripes or spots. Information technology doesn't matter what colors the pufferfish ends up, every bit long as they have fun!
Pace three: Cut And Stick The Fins
Your pufferfish needs some actress fins, and then describe some slightly tapered rectangles on your colored card, so assist your child to cut around these. They should be stuck to the dorsum of the newspaper plate, so they want to be quite long, assuasive them to stick out past the plate's edges.
Stick them so that they fan out on either side of the puffer fish's head.
Step 4: Cut Out The Eyes
Help your child cutting two large white circles, so apply the mark to add pupils to them. Gum these in the upper half of the puffer fish'south body, and draw a picayune smile beneath them.
Step 5: Add Concluding Details
Your kid tin at present utilize pens or some other pigment color to add any final details, such as spots or spirals, to further decorate the pufferfish. Once they are happy, set the pufferfish bated to dry. It tin also be hung up by a thread if you similar.
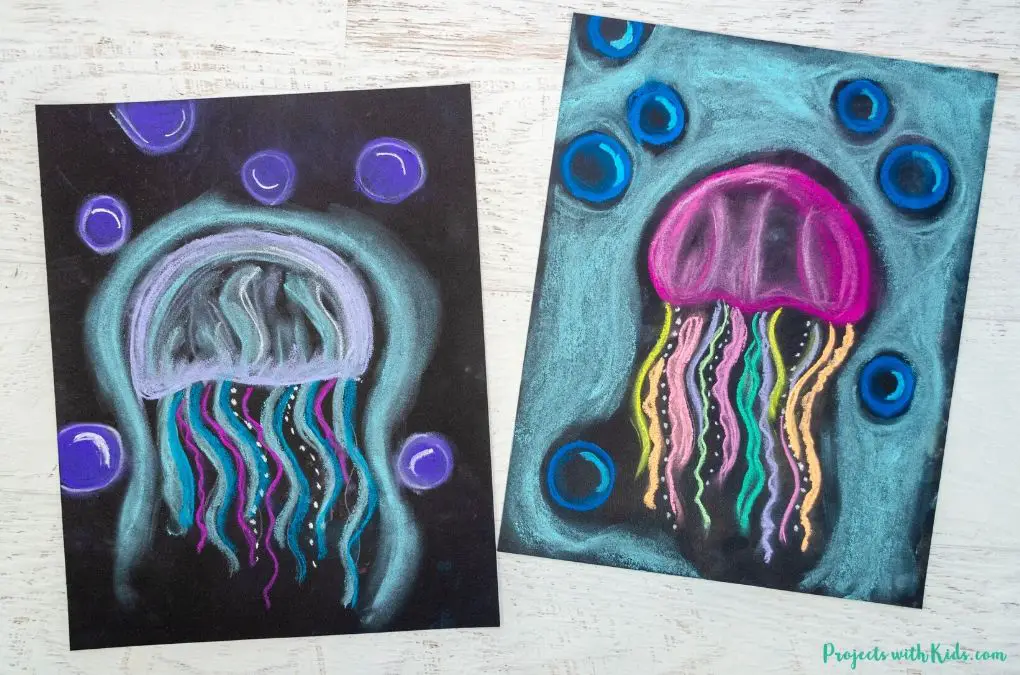
Chalk Jellyfish
Source: https://www.projectswithkids.com/chalk-pastel-jellyfish-art-project/
If yous want a elementary, minimal mess and low-supervision craft, a chalk jellyfish can be a peachy ane.
Materials
For this craft, you'll demand to gather up:
- A large sail of black newspaper or bill of fare
- Enough of chalks
- Spray varnish
Step 1: Draw The Jellyfish Body
Your kid should start past drawing a jellyfish body almost the height of the paper. This wants to exist fairly oval, with a wavy bottom. They tin cull any colour they like, though light colors will show upwards better on the black background.
In one case they are happy with the body's shape, they can colour it in fully, or just shade parts of information technology to add together a sense of depth and color.
Step 2: Add The Tentacles
Next, the jellyfish needs a adept wood of tentacles. Encourage your child to use a multifariousness of colors and different thicknesses. They may also want to add some lines of dots to indicate tentacles that are further back.
The tentacles can once again exist colored or left unfilled.
Step three: Draw Some Bubbles
Function of what makes this art striking is the lite colors against the background, so your child probably doesn't desire to cover too much of the black up, simply a few petty bubbles rising through the water will give the jellyfish some context and make the motion-picture show look finished.
Bubbling can exist drawn in all unlike sizes, and should merely have a few curves of chalk to indicate the shine of light within the chimera. Don't worry too much though; as long every bit your child is having fun, information technology doesn't thing if the bubbles aren't super realistic.
Step 4: Varnish The Picture
Once your kid is satisfied with the picture, yous should use some spray-on varnish to fix the chalk, or yous'll find information technology comes off and smudges every time the motion-picture show gets touched.
Spray the varnish in a very ventilated infinite and let it dry out earlier you closing windows, etc. Don't spray it with your kid nearby.
In one case the varnish has stale, they can hang the motion picture upwards in their chamber or on the refrigerator.
Bounding main Flooring Sculpture
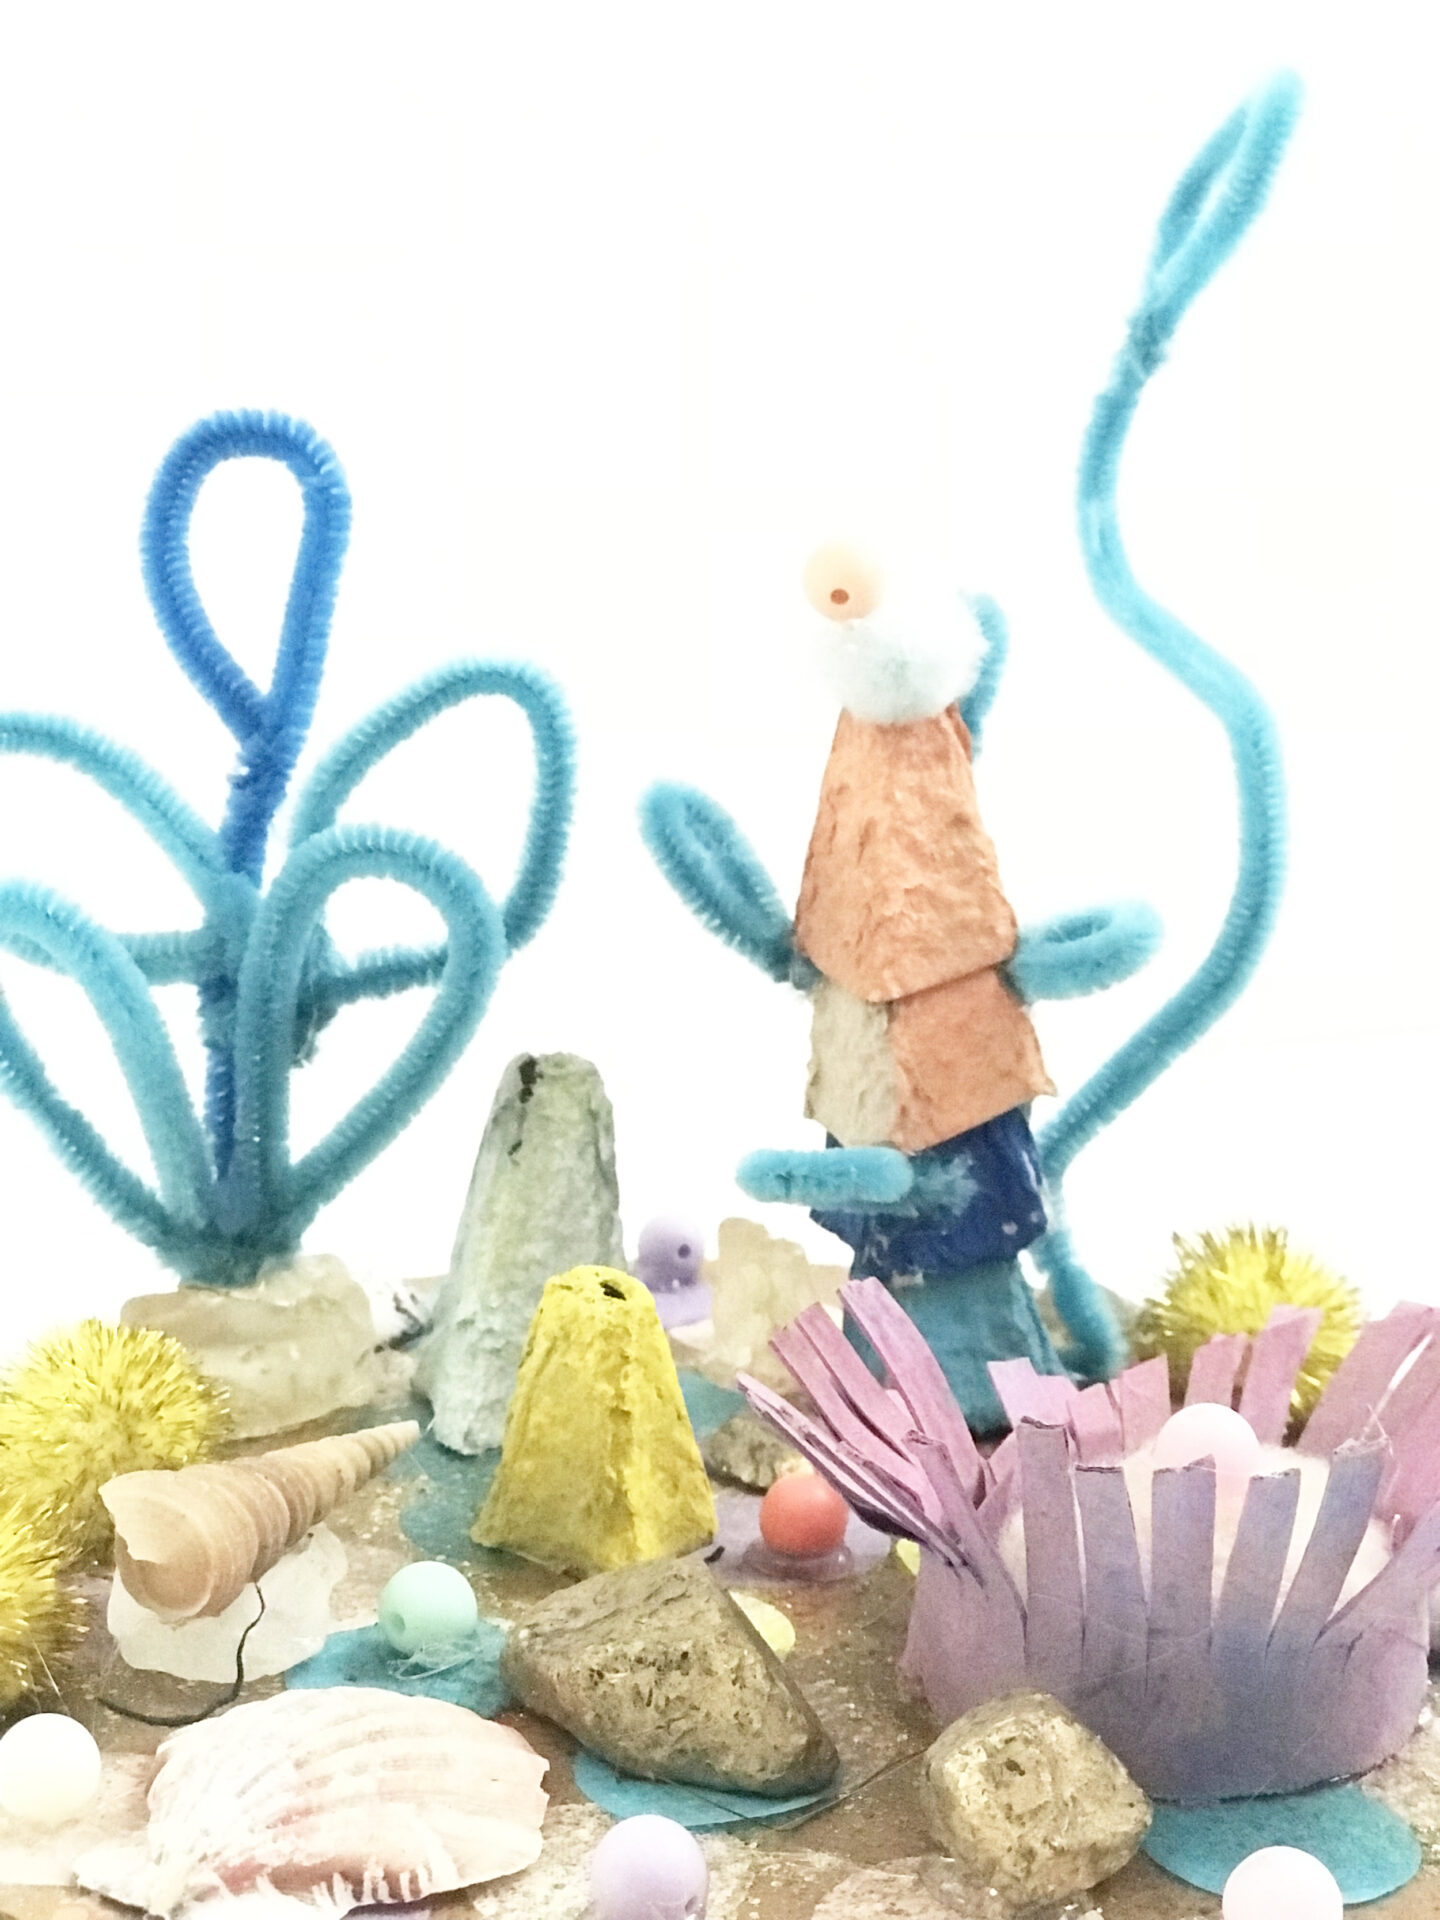
You tin create a really beautiful fleck of sea art using an erstwhile (preferably big) cotton fiber bud container or any other totally clear container that has a lid. This tin be quite an involved piece of art, or you tin go along it fairly simple.
Materials
You lot're going to need:
- Yellowish bill of fare
- Some small pebbles
- Green tissue paper
- Colored card (of any colors)
- Shiny carte
- Mucilage
- Scissors
- A pencil
- A sprinkle of sand (optional)
- Clear fishing wire
- Superglue
Step 1: Cut Your Base
Start, you're going to assist your preschooler cut a base for the container. Draw around the container on the yellow card, then cut this out. You lot may need to trim it down slightly. Check that it will fit into your container. Tip it back out so you can decorate it.
Assist your child add together some dabs of mucilage and sprinkle the sand on (if you lot're using it) to brand the base of operations pretty.
Step 2: Twist Up Some Seaweed
Get your child to tear off some thin strips of the dark-green tissue, and and then twist this up into seaweed. A dab of glue on your sandy floor, and you can assistance them mucilage the seaweed into a little clump.
Footstep three: Add The Stones
If you can find any tiny pebbles, add them to the base. If you can't, don't worry too much; you tin can either utilise some rolled-up scraps of paper or just leave the base of operations sandy.
Step 4: Brand Some Fish
Assistance your preschooler cutting some little fish out of the colored and shiny card. These should be quite small, and they don't need to be very groovy. If you don't have a shiny card, use a little bit of aluminum foil instead. Shiny fish will look great in the shoal as they will catch the light nicely.
Step five: Mucilage The Line-fishing Line To The Lid
Cut several pocket-size lengths of your clear line and and so use the superglue to adhere these to the chapeau of the container, and so that they hang down into the primary compartment.
Be very careful not to permit niggling fingers almost the superglue; put information technology away every bit soon equally y'all accept finished with this step.
Step 7: Gum The Fish On
Use white glue and help your kid mucilage the fish to the dangling lines. This will append them beautifully in your footling tank. They can be glued at different heights, or in colour clusters to create shoals. Cut off whatsoever excess line-fishing wire to go far expect tidy.
Once the fish are stuck in place, put the lid on the container and admire your amazing bounding main scene!
Step 8: Add together More Details (Optional)
If you have space (this will depend on container size) and y'all're feeling inspired, you can keep adding to your ocean scene.
Ideas for other things include a little carmine crab, or possibly a treasure chest. Both of these can hands be made from cardboard, though they may prove a flake too complicated for your preschooler unless they are really keen.
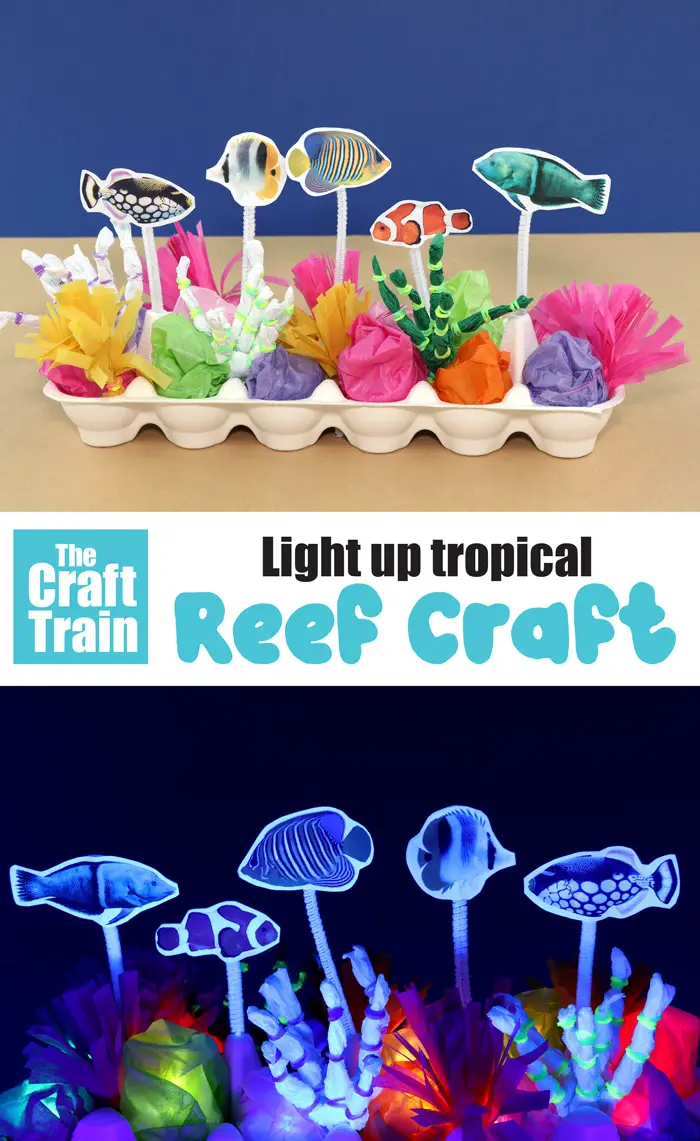
Tropical Reef Egg Carton
Source: https://www.thecrafttrain.com/lite-up-reef-craft/?utm_medium=social&utm_source=pinterest&utm_campaign=tailwind_tribes&utm_content=tribes&utm_term=1101615042_51205822_132164
You can create an amazing tropical reef with very few materials, and your preschooler will honey learning nigh the unlike kinds of fish. This is also a corking opportunity to explicate a scrap more about coral and how important reefs are to the planet.
Materials
An egg carton reef needs:
- An egg carton
- White glue
- Colorful tissue paper in reds, oranges, greens, etc.
- Toothpicks
- Scissors
- Loom bands
- Fish printouts
- White carte
Step 1: Print Out The Fish
Detect some brightly colored fish online and let your preschooler cull some to impress out. Cut them out and stick them to the white card, and then cutting them out again. This volition make them sturdier.
If you accept time, information technology's best to print a reverse image for each fish so that you can make your reef double-sided. Don't worry if yous would rather not do this, though; it'due south proficient to go along crafts simple for little ones so they don't lose interest.
Step 2: Cut Your Egg Carton
You simply demand one-half of the egg carton that contains the cups; you tin can cut off and discard the other half (or let your preschooler tear it off).
Footstep 3: Fill In The Reef
Help your child tear the tissue into pieces, and twist and constrict information technology into the cups. Use gum to secure it, and spend a fleck of time helping your child model it into interesting shapes.
Yous can cut long fronds or fans, twist, and spiral bits, or squash nodules downwards to make sponges. You might desire to look at some reef pictures for inspiration.
Stride 4: Keep Adding Detail
Take some longer strips of tissue and roll them upward into tentacle-like tubes. You tin decorate these with a few stripes using a neon gel pen, or help your toddler put loom bands around them for a chip of color.
Curve and wriggle them around, and then glue them in patches to the carton, similar reaching worms.
Step 5: Gum The Fish On
Gum each of the fish printouts to a toothpick, and then glue each toothpick to the egg carton. This will suspend the fish in a higher place the reef so they look like they are pond in and out of the coral. Try to get them at different heights and angles.
Step 6: Add together Details (Optional)
Once the fish has stale, get your preschooler to think about what else they would like to add to the reef.
You lot could include some little stones, or maybe a imitation pearl or 2 hiding in among the tissue. Also consider some light-green tissue seaweed, as mentioned in the last projection. Alternatively, consider cutting a pocket-size starfish out of an orange card, or meet if you tin observe some tiny shells to add to the edges.
Information technology doesn't thing likewise much if this is realistic to an actual reef; just permit them have fun.
Conclusion
You should now have some astonishing ideas for ocean crafts yous tin effort with your preschoolers. These offer yous groovy opportunities to talk virtually the underwater world and the unlike creatures that might be constitute there.
Source: https://craftwhack.com/ocean-crafts-for-preschool/
0 Response to "4 Amazing Ocean Crafts for Preschool · Craftwhack"
Post a Comment